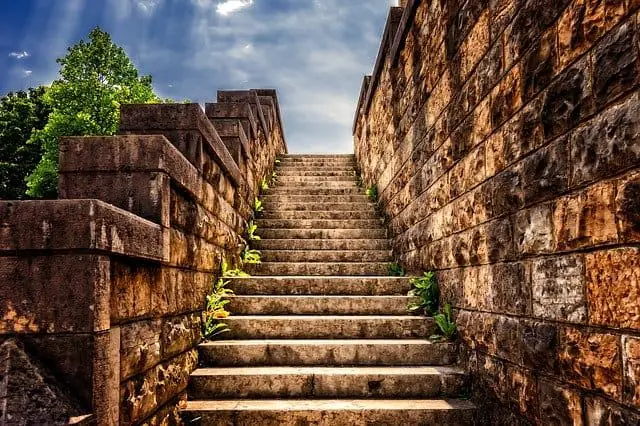
You don’t have to be a New Englander to appreciate a well-built stone wall, though it probably helps. The first settlers found stone everywhere, pushed up by the ground as it froze and thawed. Fortunately, the same stones that stopped the plow, defined the boundaries of newly cleared fields. Decades passed. The earth swallowed up the settlers and the forest reclaimed much of the farmland. But the stone walls endure, faithfully outlining the old homesteads, now deep in the woods.
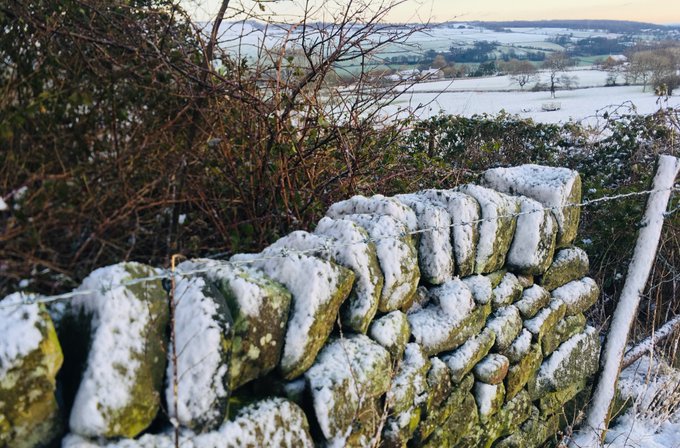
Surprisingly, those walls were dry-laid. Dry-laid stone walls—built without mortar—enclose and define space in an organic way. In your yard or garden, they can emphasize grade changes or encircle planting beds. They provide the ideal habitat for honeysuckle, ivy and other climbing and niche-loving plants. They’re at home in nearly any setting, with almost any house style. The five-step process we detail here will help you design and build your own timeless walls, or collaborate with an expert mason on a stone wall project.
Design Your Stone Wall
The kind of wall you build depends on your site’s characteristics, the type and quantity of stone you use, and the amount of talent and elbow grease you can muster. Even with levers, wooden ramps, carts (here is a heavy-duty one from Amazon) and other aids, stone wall construction is hard work. This might be a good time to get acquainted with local high school football players who’d like to earn some extra money.
Now let’s get to it. Here are the three major stone wall types:
Traditional dry-laid walls
Drystone walls, capable of moving and settling as well as letting water sluice through them, will outlast their less flexible cousins made with mortar. If the drainage underneath them is decent (to prevent frost heave), dry-laid walls are also fairly easy to repair as well as to revise. But the traditional wall demands the best stones—a lot of them. If you’re new to stonemasonry, try building a low wall around a tree or small flower garden, for example. Walls like this can be straight-sided and built with just a few courses of stone. A stone wall higher than about 30 inches looks better and lasts longer if you build it with “battered” walls—thick at the base and narrow at the top.
Rubble-filled, mortared walls
When it’s finished, a rubble-filled mortared wall can look much like a dry-laid wall. The difference lies in the center. Round or poor-quality stones, old bricks, broken-up concrete and other rubble make up the wall’s core. Only the attractive “face” stones go where they can be seen. Professional stonemasons sometimes take a shortcut to the dry-laid look by using standard concrete mix to fill gaps between stones, but this method has its shortcomings. Appearance suffers if the mortar shows between the stones, and too much mortar makes the wall rigid; this invites cracking and structural problems down the road.
Retaining walls
While poured concrete or stacked railroad ties may come to mind when you think of retaining walls, you can easily make small retaining walls from stone. Since there’s ample natural drainage between the stones, you’re automatically spared the problems of drainage tiles and weep holes that go along with using mortar. Long, flat stones work best in this kind of wall. Make sure that any stone retaining wall higher than 2 feet or so leans back into the slope it’s meant to retain. The thickness of the base should be at least a third of the total height.
Collect, Order and Organize Your Stones
Stones come in all sizes, shapes and colors, and it takes a lot of them to make a wall. It’s sensible to amass a vast rock collection before you start building. Structurally, shale, slate, schist and limestone work best in walls. Natural cleavage planes in these rocks allow them to split along parallel lines, so they break into stones with flat tops and bottoms.
How much to get
To calculate how much stone you’ll need, determine the volume the wall will occupy. Simply multiply thickness times height times length. Some stone suppliers sell by the cubic yard, so you’ll need to divide a cubic-foot measurement by 27 to get cubic yardage. Other suppliers sell stone by the ton—that’s 12 to 16 cubic feet, depending on density. Still, other stone suppliers sell by the pallet load. Expect a typical pallet to contain about 20 cubic feet of stone and weigh about 1 1/2 tons.
Where to get it
You can go to a stone supplier, of course, but maybe you don’t need to. If your property contains old stone walls or other rocky reserves, your material is free. Just make sure you have the right gear for getting stones out of the ground and conveying them to the site of your new wall. Along with your pick and shovel, you’ll need a digging bar at least 5 feet long, a shorter pry bar, some heavy rope, and a wooden sled, garden cart or wheelbarrow. Choose a heavy-duty model that can tilt up on end or on its side so that heavy stones can be tipped in.
What about other stone sources? If you’re fortunate enough to live near a quarry, inquire about stone classified as “quarry waste.” This is usually shale or other sedimentary rock, and it can be perfect for walls. Construction sites can also yield a good stone supply, especially where excavation and earthmoving work is being done. The finest building stone comes from abandoned buildings and old cellar holes. In most cases, “rock from ruins” has already been shaped to create the flat faces and square corners you need.
Sorting your stone
Building a stone wall is like assembling a large, heavy, three-dimensional puzzle. Sort your stone supply as described below and the puzzle will go together more quickly.
Cornerstones have two fairly flat faces that meet at a right angle. These are most prized by stonemasons.
Capstones need to be broad and flat. The best capstones are long enough to span the top of the wall.
Tie stones need to be long enough to extend all the way through the wall. They strengthen it by bearing on a lower course of smaller stones.
Risers are massive stones that extend up through two (or more) narrower courses. They create pleasing visual breaks from horizontal joint lines.
Shim or chinking are the small pieces that fill gaps or, wedged between larger stones, add stability.
Rubble just means round or poorly shaped stones, broken brick or masonry, and other unsightly hard stuff—filler material.

Dig Trenches and Lay Footings
As this drawing shows, a freestanding stone wall doesn’t require the deep footings you need for a building’s foundation. (It does require reasonably good drainage beneath it, however.) Most stonemasons like to dig through any loamy topsoil to reach solid earth that can be tamped firm and fairly flat.
Dig a shallow, square-cornered trench like the one shown here.
For a solid footing, place large, flat-faced stones close together in your trench, and fill the gaps with small stones and gravel. Don’t let the top surfaces slope outward. A slight inward slope is best: it lets gravity help hold the wall together. Step on footing stones to test their stability, and correct any wobbles before moving on to the next step.
Set Up Stakes and String Lines
String guidelines will help you keep the face stones aligned as you lay them into position. Drive stakes deeply and firmly into the ground outside the footing stones and stretch mason’s line between them. Once you’ve got the ends of the wall underway, stretch lines between the ends to guide you as you lay up the middle of the wall.
Begin at the Ends
Even if you’re building a curved stone wall, start the ends of the wall first and build up your corners before the other sections. Also, remember that the ends demand your best stones—those with at least two flat faces that meet at close to 90-degree angles. (Don’t forget this when you sort and move your stones.) Use a line level to keep an eye on the mason’s line as you add courses of stone along the middle of the wall; otherwise, you won’t get nice even courses like the ones shown in our photos.
Tips From the Pros
Move the heavy stuff with levers (here are some from Amazon), skids, rollers and ramps. You’re not building the pyramids, but it helps to think like an ancient Egyptian when working with stone.
If you have to lift, use your arms and legs. Better yet: use someone else’s arms and legs. (Remember the football players mentioned earlier?) Seriously, if you must lift a heavy stone, don’t bend over at the waist to do it. Make sure you and your helper(s) lift safely to avoid injury. Better yet, lever a big stone into a sturdy garden cart or wheelbarrow, then move it without lifting.
Two stones over one, one stone over two.
This simple rule creates layered, overlapping construction that maximizes strength and stability. It also makes for a good-looking wall.
Work from the outside in. Focus on the visible face of the wall, positioning each face stone until it looks good and fits well.
Shape and break stones with a mason’s hammer (a small sledgehammer, here is the best choice from Amazon) and cold chisel. Avoid the hard work of splitting stones whenever you can. Instead, put your energy into chipping off the surface irregularities that cause stones to wobble or fit poorly. A 1-inch-wide chisel works well for delicate shaping, but keep a wider one handy for more substantial shaping and splitting work. When you must split a stone, try to break along “grain” lines or striations that may indicate cleavage planes.
Safety
Always wear safety goggles when you’re hammering stone.
Tools
- Pick-mattock
- Shovel
- 5-foot digging bar
- Pry bar
- Heavy rope
- Heavy-duty garden cart
- Tamper
- Line level
- Mason’s hammer
- Sledge hammer
- 1-inch cold chisel
- 2 1/4-inch cold chisel
Materials
- Steel-toed shoes
- Heavy leather work gloves
- Safety goggles
- Knee pads
- Mason’s line
- Stakes