A running toilet not only wastes lots of water, it’s irritating to hear. The good news is that you can often solve the floating ball problem with equal parts diagnosis and repair. And you need only a few simple tools to fix things.
The quickest way to diagnose the problem is to take the tank lid off and observe how the toilet works through several flush cycles. (Don’t worry about handling parts inside the tank, the water in it comes directly from the cold water pipes and is perfectly clean.) To protect the tank lid while you work, set it on a towel out of the way.
Note how long the water flows and what sounds it makes as it fills. If the water runs constantly between flushes, suspect a high float arm or stuck flush valve. If water cycles on and off with minutes of silence between hissing sounds, the flush valve probably has a slow leak.
When you push down a toilet handle, it lifts a rubber tank ball or flapper from the flush valve at the tank’s bottom. Water rushes out of the tank and washes down the sides of the bowl. This displaces the bowl’s wastes and water, and forces them over a trap cast in the toilet’s base. When the tank is empty, the tank ball or flapper falls and seals the flush valve for filling. At the same time, a float-activated valve, called a ballcock, opens to fill the tank with water for the next flush. When the float rises, the ballcock shuts off the water. Newer toilets typically have a simpler Fluidmaster fill valve instead of a ballcock.
If Water Rushes Constantly
If water rushes into the toilet bowl continuously, the flush valve is not closing. There are several possible reasons for this.
If the tank has a flapper, the culprit is usually the chain connected to the flush arm. Free the chain so that the flapper drops into place. Check that the flapper is properly aligned with the flush valve opening. Replace the flapper if it is decayed or distorted.
If the toilet has a tank ball, it may also stick. If the lift wire is bent, replace it.
If the flush arm jams in the “up” position on each flush, loosen the reverse-threaded nut that holds it to the tank wall.
If Water Hisses Constantly
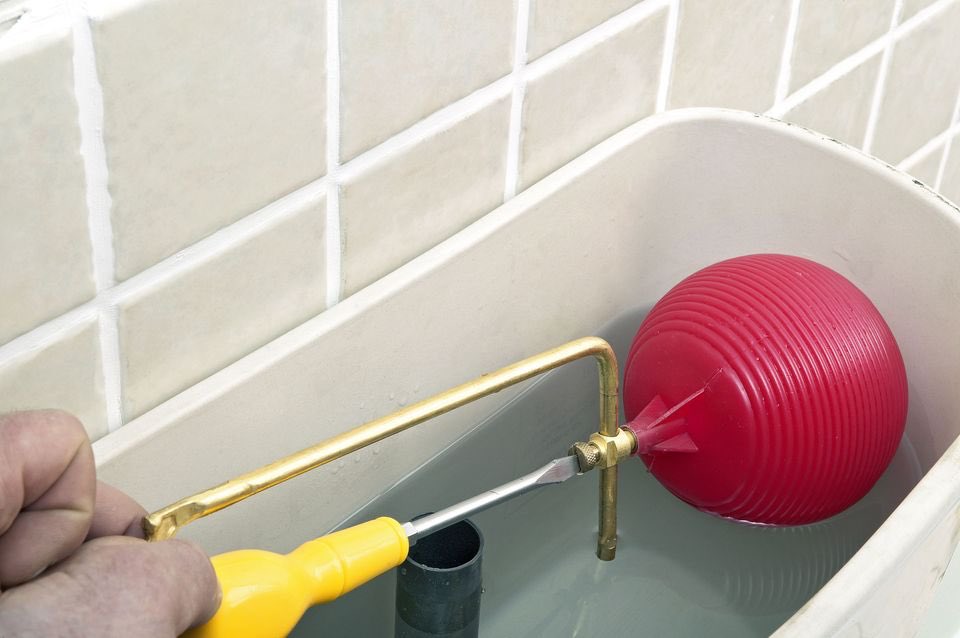
If the flush valve is closed and water is still running, the water level in your tank could be set too high. If so, the water spills constantly into the overflow tube. To lower the water level, bend the float arm down. You can do this without even turning off the water or draining the tank. If you have a Fluidmaster fill valve with a float cup, squeeze its adjusting clip with your fingers and slide it down the rod.
Rule of Thumb:
Thirty to 40 percent of an average home’s water use goes into flushing toilets. Lowering the water level saves water on every flush.
If Water Hisses Intermittently
Gurgling noises and water trickling into the bowl are signs of a slowly leaking flush valve, especially if the toilet cycles on intermittently when no one has used it. As the tank level drops, the ballcock or fill valve opens to refill it. Often, this valve’s cycling on and off is the only sign of trouble. Flush valve leaks may be so slow that you can’t see or hear them. A dye test is the surest way to find out. Add food coloring or a dye tablet to the toilet tank water and wait at least 15 minutes to see if the color finds its way to the toilet bowl. If the color leaks through, it’s time to repair the flush valve seal.
Step by Step
Realign the ball or flapper. If you can see and hear water flowing into the bowl, the tank ball or flapper probably doesn’t sit properly in the flush valve. Shut off water to the tank by turning the angle stop (usually on the wall at the lower left of the tank) clockwise, flush the toilet and watch how the ball or flapper settles on the flush valve opening. If you have a tank ball, loosen the screws on the overflow tube and adjust the guide arm so that the ball settles correctly. If you have a flapper, twist the rubber ring that holds it to the overflow tube.
Replace the ball or flapper. If realignment does not solve the problem, replace the flush ball or flapper.
Clean the flush valve. If a new ball or flapper doesn’t stop the from running, clean the flush valve seat with 600-grit wet/dry sandpaper.
If the valve still leaks, you can retrofit its surface with a glue-on flush valve seat kit (Fluidmaster model 555C) that provides a new surface over the old seat.
Recommended tools & supplies:
Adjustable Wrench
Screwdriver
Tongue-and-Groove Pliers
Putty Knife
Mini Hacksaw
Wax Toilet Gasket (check at Amazon)
Fill Valve Repair Kit (check at Amazon)
Toilet Seat
Toilet Tank Ball
Rim Sure Flush Toilet
Flush Lever
Anti-Siphon Repair Kit
Flush Valve