Concrete driveways are known for their durability and long-lasting properties, but over time they can become worn out and cracked. One solution to this issue is to resurface the driveway. Resurfacing a concrete driveway involves adding a thin layer of concrete over the existing surface, giving it a fresh new look while also improving its strength and durability.
DIY concrete driveway resurfacing has become a popular option for homeowners who want to save money on hiring professionals while also having control over the process. However, it’s important to have a solid understanding of the materials and techniques involved in order to achieve the desired results. In this article, we will discuss the steps involved in DIY concrete driveway resurfacing, including necessary tools and materials, common challenges faced during the process, and tips for achieving professional-looking results.
Evaluating The Condition Of Your Driveway
An evaluation of your concrete driveway’s condition is crucial before commencing any resurfacing process. The first step in this assessment is a thorough cracks analysis to determine the extent of damage. Small, hairline cracks may only require minor repairs, while larger ones may need more extensive measures. It’s also essential to identify and address the root cause of these cracks to prevent them from reoccurring after resurfacing.
The second crucial step is stain identification as stains can significantly affect the visual appeal of your driveway. Different types of stains require specific cleaning methods for effective removal. For instance, oil and grease stains need degreasing agents, while rust stains require acid-based cleaners.
Surface leveling is another aspect to consider during an evaluation process. Uneven surfaces can result in water collection, which can lead to further damages such as cracking or potholes. Therefore, it’s vital to level your driveway surface before resurfacing it.
Additionally, drainage inspection is necessary when assessing your concrete driveway’s condition. The slope of the driveway should be examined to ensure that water flows away from the house and towards the street or drainage system. Poor drainage can cause water buildup underneath the surface leading to structural problems later on.
Weather considerations are equally important when evaluating your driveway’s condition. Concrete resurfacing should not be done in extremely hot or cold weather conditions as they affect curing times and overall quality of workmanship. Ideally, temperatures between 50-90°F with mild humidity levels provide optimal conditions for concrete resurfacing.
After completing a thorough assessment of your driveway’s condition, it’s time to gather all necessary tools and materials for the resurfacing process.
Gathering The Necessary Tools And Materials
After evaluating the condition of your driveway, it is time to gather the necessary tools and materials for the resurfacing project. You will need a pressure washer, concrete resurfacer, concrete patching compound, trowel, and a stiff-bristled brush. These tools can be rented or purchased at your local home improvement store. It is important to have all the necessary tools before starting the project to avoid any delays.
 In addition to tools, you will also need materials such as bonding adhesive and a sealer. The cost of these materials depends on the size of your driveway and the quality of products chosen. It is important to consider cost when choosing materials but keep in mind that higher-quality products may result in a longer-lasting driveway. Professional services can cost upwards of thousands of dollars but doing it yourself can save you money.
Before starting any DIY project, safety should be a top priority. Concrete resurfacing requires working with chemicals and power tools which can be dangerous if not handled properly. Proper protective gear such as gloves and eye protection should be worn at all times. If you are unsure about any step in the process or do not feel comfortable handling certain equipment, it may be best to hire professional services.
While DIY concrete resurfacing can save money, it is important to weigh the benefits against potential risks. Hiring professional services guarantees high-quality results but comes at a higher cost. With proper preparation and attention to safety precautions, DIY concrete resurfacing can yield satisfactory results at a lower cost than hiring professionals.
To ensure proper adhesion of the new surface layer, cleaning and preparing the surface is crucial before applying any products.
Cleaning And Preparing The Surface
To achieve a successful concrete driveway resurfacing project, the surface must be thoroughly cleaned and prepared. The first step in this process is pressure washing. This will remove any dirt, debris, or loose material from the surface. It is important to use a high-pressure washer with a fan tip nozzle to effectively clean the area.
After pressure washing, it is essential to remove stains that may have penetrated deep into the concrete. A commercial-grade concrete cleaner can be used for this purpose. If stains are particularly stubborn, a solution of water and bleach may also be effective. Ensure that all stains are completely removed before moving onto the next step.
Once the surface is clean and free of stains, it’s time to repair any cracks or holes present in the concrete. These areas should be chiseled out to create a smooth surface for patching. Use a concrete patching compound to fill in these areas and ensure that they are level with the rest of the driveway.
Finally, smoothing out rough spots on the surface will ensure an even finish when resurfacing with new material. One way to do this is by using a grinder or sander with diamond pads which can remove any unevenness on the surface of the driveway. Once all these steps are completed, you’re ready for mixing and applying the concrete resurfacer.
The next step after cleaning and preparing your driveway surface is mixing and applying your concrete resurfacer. With careful attention to detail during preparation, you’ll be able to achieve professional-looking results when applying your new layer of concrete over top of existing surfaces.
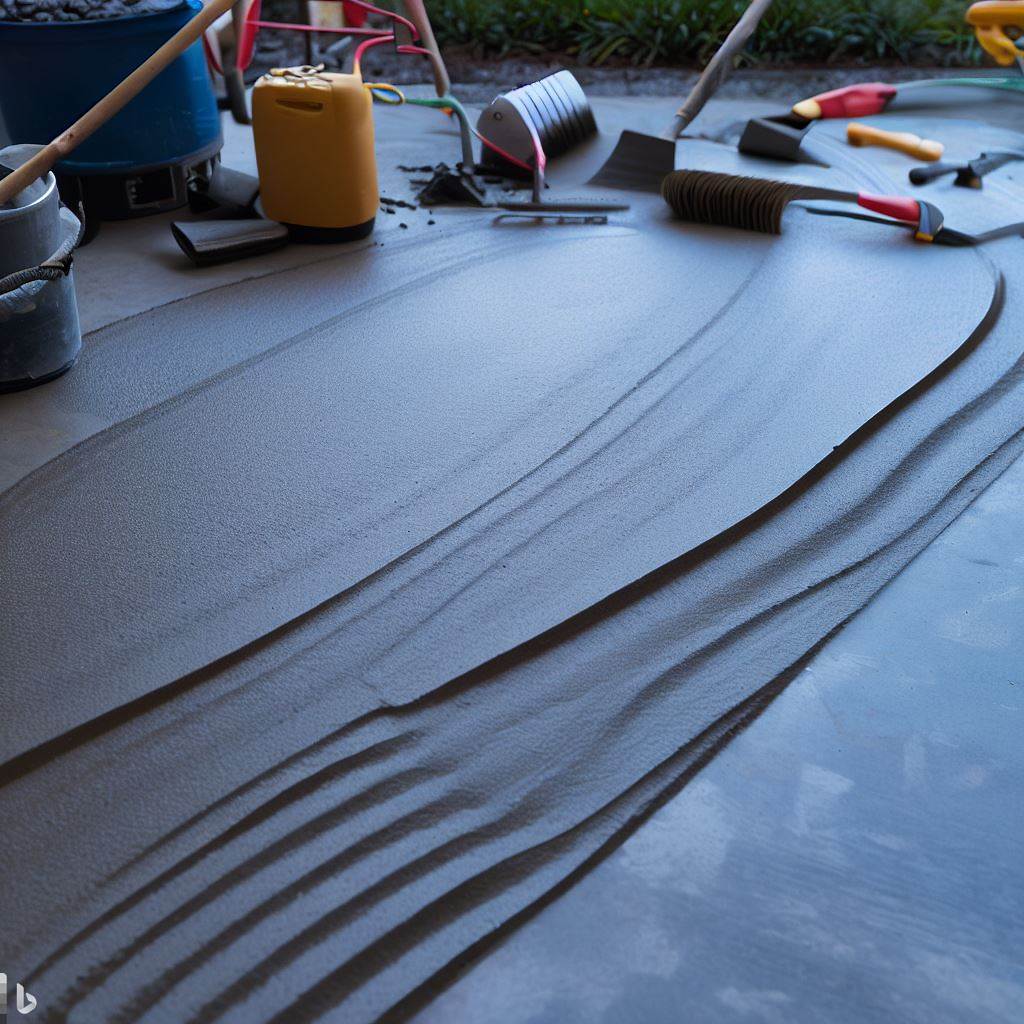
Mixing And Applying The Concrete Resurfacer
To begin mixing your concrete resurfacer, it is essential to have all the necessary tools and materials on hand. These include a large mixing bucket, a drill with a mixing paddle attachment, water, and the dry mix. It is important to thoroughly read the manufacturer’s instructions for the specific product being used before beginning the mixing process.
Once you have gathered all the necessary materials and tools, measure out the required amount of dry mix into your mixing bucket. Begin adding water gradually while constantly stirring with your drill and paddle attachment. Be sure to follow any guidelines provided by the manufacturer regarding water-to-mix ratios for optimal results.
Mixing Tips:
- Always wear protective gear such as gloves and a mask when handling dry mix or wet concrete.
- Check for any lumps in the dry mix before adding water to ensure consistent texture throughout.
- If using color additives or other special products, be sure to add them during the mixing process according to manufacturer instructions.
After achieving a smooth and uniform consistency for your concrete resurfacer, it is time to begin applying it to your driveway. Using a long-handled squeegee or trowel, distribute the mixture evenly across your surface in thin layers. Take care not to apply too much at one time or in one area as this can result in cracking or uneven drying.
Application Process:
- Work in sections of no more than 4 square feet at a time for best results.
- Apply additional layers as needed until reaching desired thickness.
- Smooth out any rough spots or bubbles with a finishing tool such as a steel trowel or broom.
Consistency control is key when working with concrete resurfacer. The drying time can vary depending on factors such as temperature and humidity levels but typically takes around 24 hours per layer applied. Once dry, finishing techniques such as staining or painting can be applied if desired.
Without proper drying time and curing, your newly resurfaced driveway may not hold up as expected. In the next section, we will discuss the importance of allowing the surface to dry and cure properly before using it for regular traffic.
Allowing The Surface To Dry And Cure Properly
After applying the concrete resurfacer, it is crucial to allow the surface to dry and cure properly. This will ensure that the newly applied layer adheres well to the existing concrete and remains durable over time. However, before proceeding with drying and curing, it is important to conduct moisture testing on the surface. This is because excess moisture can cause the newly applied layer to crack or peel off.
To conduct moisture testing, place a small piece of plastic on top of the resurfaced area and seal it tightly around the edges with duct tape. Leave it for 24 hours and then check for any condensation or moisture underneath the plastic. If there is no moisture, then you can proceed with drying and curing. If there is any moisture present, wait until it has evaporated completely before continuing.
Time management is also essential in ensuring proper drying and curing of the resurfaced area. It is recommended to avoid using or walking on the surface for at least 24-48 hours after application. Moreover, weather considerations should be taken into account as well. Avoid resurfacing during rainy or humid weather conditions as these can result in excessive moisture buildup that can interfere with proper drying and curing.
In addition, surface leveling should be done before applying a protective coating to ensure an even finish. Use a scraper or sander to level out any rough spots or unevenness on the surface before proceeding with coating application. Once complete, apply a protective coating such as sealer or epoxy to protect against harsh weather conditions and wear-and-tear damage.
Properly allowing your concrete driveway resurfacing project to dry and cure will go a long way in ensuring its longevity and durability over time. Conducting moisture testing, managing time effectively, considering weather conditions, properly leveling surfaces prior to coating application, and utilizing protective coatings are all essential elements of successful concrete driveway resurfacing projects.
Frequently Asked Questions
How Long Will The Resurfacing Last?
The durability of a concrete driveway resurfacing largely depends on various factors such as the maintenance tips, weather conditions, application techniques, and cost analysis. Proper maintenance is crucial to ensure longevity of the concrete surface. Regular cleaning and sealing can help prevent cracks and discoloration caused by exposure to elements like UV rays or corrosive chemicals. Weather conditions also play a significant role in the life of a concrete resurfacing project. Extreme temperatures and moisture levels can cause cracking or flaking of the surface. Moreover, the quality of materials used during the application process affects its overall durability. A thorough analysis of costs should be conducted to determine whether it is worth investing in high-quality materials that may last longer but come with a higher price tag. As an expert in concrete resurfacing, these are important considerations when assessing how long a resurfaced driveway will last.
Can I Use Regular Concrete Instead Of A Concrete Resurfacer?
When considering resurfacing a concrete driveway, it is important to evaluate the benefits and limitations of using regular concrete rather than a concrete resurfacer. While regular concrete may be cost-effective and readily available, it may not provide the same level of durability as a specialized resurfacer. Additionally, the suitability of regular concrete for use in resurfacing will depend on factors such as the condition of the existing surface and the desired final appearance. Ultimately, a knowledgeable expert can help determine whether regular concrete is an appropriate choice for driveway resurfacing based on various factors such as budget, aesthetic preferences, and performance requirements.
Can I Apply A Sealer Over The Resurfaced Driveway?
When considering applying a sealant over a resurfaced driveway, it is important to consider sealer compatibility with the original material and the resurfacer. Application tips for the sealer include ensuring that the surface is clean and dry before application, using a quality brush or sprayer, and avoiding over-application. Weather considerations also play a role in successful sealer application, as temperatures should be above 50 degrees Fahrenheit and there should not be any rain in the forecast for at least 24 hours after application. Drying time can vary depending on weather conditions but typically takes between 24-48 hours. Regular maintenance requirements include reapplication every 2-3 years to maintain protection against water damage and wear and tear. As a concrete resurfacing expert, I recommend thoroughly researching sealers and their compatibility with your specific project before making any decisions regarding application.
Is It Possible To Resurface A Driveway With Cracks?
Resurfacing a driveway with cracks can be a challenging task, but it is possible with proper preparation methods and necessary tools. Repairing cracks is the first step in resurfacing a driveway, as they need to be filled and leveled before any new concrete can be applied. There are cost-effective options available for DIY enthusiasts, but it is important to keep in mind that professional resurfacing services may offer better results. It is crucial to follow the manufacturer’s instructions when using products for repairing cracks and resurfacing driveways. Overall, successfully resurfacing a driveway with cracks requires careful planning, attention to detail, and patience.
Can I Add Color To The Concrete Resurfacer?
When considering adding color to a concrete resurfacer, there are several factors to consider. First and foremost is material compatibility. Not all resurfacing materials are compatible with color additives, so it is important to choose the appropriate product for the desired outcome. Additionally, there are various color options available on the market, ranging from earth tones to vibrant hues. DIY techniques for adding color can include using integral pigments or surface-applied stains. Cost comparison should also be considered when choosing a method for adding color, as some options may be more expensive than others. Finally, maintenance tips should be followed to ensure the longevity of the color and overall appearance of the resurfaced concrete.
Concrete driveway resurfacing is a cost-effective solution to improve the appearance and durability of your driveway. It involves applying a thin layer of concrete over the existing surface, which can help extend its lifespan by up to 20 years. However, it’s important to note that the longevity of the resurfaced driveway depends on various factors like climate, traffic, and maintenance.
Using regular concrete instead of a concrete resurfacer is not recommended as it may not adhere properly to the existing surface. Applying a sealer over the resurfaced driveway can help protect it from stains, water damage, and UV rays. It’s possible to resurface a driveway with cracks using a patching compound before applying the concrete resurfacer.
Adding color to the concrete resurfacer can enhance the appearance of your driveway and match it with your home’s style. Overall, DIY concrete driveway resurfacing is an excellent option for homeowners looking for an affordable and easy way to renovate their driveways. However, it’s essential to follow proper techniques and use high-quality materials for optimal results. As an expert in this field, I recommend consulting with a professional if you have any doubts or concerns about the process.