Accurate measuring depends as much on your attitude as it does on your equipment. Sharp, precise tools won’t save your work if you rush, work in bad light or let your mind wander from the task at hand. That said, here are some on-the-mark measuring and layout tips that will increase your precision and speed your work.
Keep in mind that accuracy is a relative concept. Each stage of construction may require a differing level of accuracy. When you layout a building site, an error of even 1 inch may be tolerable. By the time you bolt plates to the foundation, 1/2 inch of slop can be hidden. If you design walls 1/4 inch out of square, the house will not fall. But when you trim a door or apply baseboard, every joint shows, and so does every sloppy cut. It may seem daunting to within a 1/16-inch tolerance, but it’s really no harder to cut something precisely.
Making Your Mark
When you mark with a straightedge or combination square, place the pencil on the mark, then slide your square up to it. If you place the square first, you’ll have to guess just how much the thickness of the pencil will offset the line. You might get away with the error on rough framing, but the difference can be as much as 1/8 inch when your pencil gets dull.
Tip from the pros:
To be really precise, mark with a sharp utility knife instead of a pencil. This works best across the wood’s grain. And since the shallow cut severs the surface fibers on the board, it reduces tear-out from upward-cutting blades like those on a circular saw or jigsaw.
Checking Your Tools
Measuring tools are not created equal, nor do they remain so in use. Here’s how to check the accuracy of squares and levels:
Place a level on a flat surface and check the vial. Shim one end if needed to bring the bubble into the center of the vial. Mark the level’s location on the surface and flip the level end-for-end in the same spot. It should read level again. To check for plumb, place the level against any vertical surface and note where the bubble falls. Flip it end-for-end and the bubble should read the same, whether or not the surface is truly plumb. If not, and your level has adjustable vials, you can loosen the screws and recalibrate them. If isn’t adjustable, you’ve got yourself an expensive paint-stirring stick.
To check a square, you need a board with one straight edge for reference. Check the edge with a metal straightedge or a taut string. Use the square to mark a line across the board at a right angle to the reference edge. Then flip the square over and mark another line, starting from the same point on the reference edge. If the lines diverge, the square is not what its name implies.
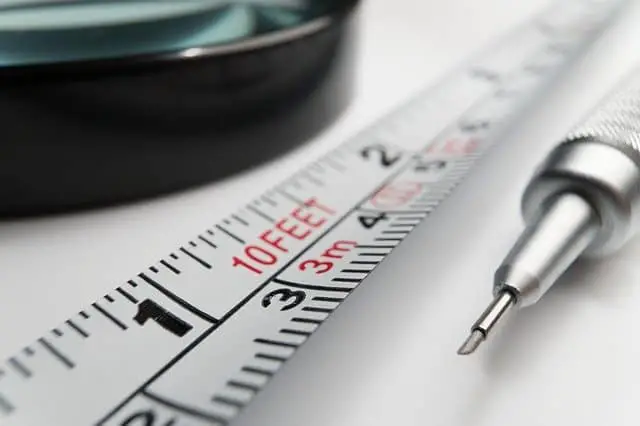
The Tale of the Tape
Tape measures are notorious for losing precision. The most common culprit is the sliding hook at the end, which, like most of us, tends to get slightly bent out of shape. The hook’s rivets allow it to slide back and forth, compensating for its own thickness and ensuring that inside and outside measurements both agree. Bend the hook slightly with pliers to adjust it so that the tape measure will read accurately when extended. Or, you can do what the pros do: eliminate doubt for key measurements by “burning an inch,” holding the tape at the 1-inch mark on the edge of the workpiece as shown.
Burn an inch
Tip from the pros: Odds are, no two tape measures will read precisely alike. When you’re working with someone else and you have no room for error, either use only one tape or calibrate both your tapes by adjusting the hooks. Stretch them out side by side from the edge of a panel to compare measurements.
When trim or a panel must conform to an irregular edge, use a compass to “scribe” the edge. Place the board against the irregular surface and align it vertically. Set the gap between the compass tips to the largest gap you must close, then drag the metal point of the compass against the irregular profile and the pencil point against the board to mark the cut line.
Tip from the pros: Undercut the board’s edge with a jigsaw so that only the front edge meets the irregular surface. (The front is all that shows on most trim work.) This thinner edge leaves less material to plane or sand as you test the fit and make fine adjustments.
The most accurate way to check for a square in a rectangular frame or box is to compare diagonal distance across the corners. Only a truly perpendicular structure can have identical diagonal measurements.
Chalking a Thin Line
A chalk line is the fastest way to layout long straight lines. The tool contains a spool of line that sits inside a chamber of colored chalk powder. When you unreel the line, it comes out coated with chalk. Hook the line-end over a board’s edge or a nail, unreel the line and pull the string taut. To mark a line, simply pull the chalk line a few inches straight up and let it go. As the taut line snaps down on the work, it leaves a neat, straight chalk line.
Tip from the pros: To mark a series of long chalk lines for a shingle layout or other project, fasten the ends of two chalk lines together and, with a partner, take turns reeling in the lines. This way, each time one person reels in one line, the other line comes out loaded with fresh chalk.